Multimedia Machine-Making
- ashelynnfuson

- Apr 14, 2019
- 4 min read
The first thing I walked into during the introduction of this activity was a video showing multiple different types of machinery that appeared to be creating art. These machines had rhythm in the way that they moved and sounded. Some of the products from the machines looked abstracted, appearing to have no repetition or plan at all, but when you watched the machine move, it was very apparent it was not so random after all.
Check out this link to see the types of art-making machines we were looking at: http://xavierbonghi.com/2372/leonard.mp4
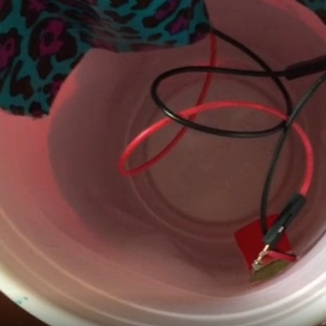
At the front table, I noticed a strange contraption sitting on a large piece of paper. It consisted of a red solo cup, a rotor-like attachment at the top, three fat markers on the bottom, and blue leopard tape adhering it all together. I remember it so vividly - it looked like trash. Now that sounds harsh, but I knew there was a purpose behind this pile of “junk”. Our professor reached under the cup to turn a switch on - turns out he had connected a battery pack and a simple motor to the cup, which allowed the handmade rotor to spin. When the rotor spun, it caused the contraption to wildly jitter around - making marks as it moved. My professor called this a Drawing Machine. We discussed what was happening - there was definitely weight considered while making this particular machine, but what else? We were asked to partner up and explore our options with the materials we had to further investigate what all went into making a drawing machine.


My partner, Ray, was exploding with ideas from the start. He already had a basic structure he wanted our machine to follow, and we agreed we would try to mimic the rotor idea. We began sketching ideas and materials when our professor came by and gave us another challenge. Each of the pairs were given a word and asked to create a machine that represented the assigned word. We stared at our card - “CONTENT”. What does that even mean? Of course we knew the definition of the word, but what would “content” look like through a machine? The mark-making and material chosen would be essential to representing the word we were given. Since we only had one class period to work on this, we knew we might not have time to perfect the type of mark, so we focused on choosing bright colors and a soft medium such as pastels. Unfortunately, pastels were not sturdy enough to be the support of our machine, so we chose sharpies for the four corners. I suggested the idea of attaching a pastel to a string, so as the machine moved, it would create soft, careless (aka random) marks. We chose to incorporate this idea by attaching the string through the middle - this meant we would have five total colors.


During the construction of our machine, we ran into a lot more problems than expected. The sharpies were aimed to be our main support system, but it was tricky to get them to stand straight and not cave in. We fixed this issue with tape - LOTS of tape! After building the base, we attached the battery pack and motor to a cup. Figuring out the exact weight difference our rotor needed to have in order to make the machine move was the trickiest part. We made the rotor out of popsicle sticks, attaching coins to one end so there would be a weight difference. It took us awhile to get it down, but we eventually found a weight that would make the machine move. Turning the switch on and watching this inanimate object create marks was an empowering moment that I’ll never forget! Technology and machines have always seemed so foreign to me, so creating something that actually worked was exciting. It was not perfect, but it didn’t have to be.

Our machine would only work for a few seconds before the rotor would begin to detach, creating an absolutely awful noise while also halting the mark-making. This would just not do! That noise was definitely not “content”. We worked on problem-solving this issue up until it was time to share our creations. The presentation of our machine went really well. The machine stayed in the same general area, creating colorful dash-like marks. The end result was comparable to a firework - colorful marks in a random, but radial pattern. The marks from the pastel were pretty subtle, but still identifiable. Through creating our own machine, we learned to expect a lot of trial and error - just because you have a plan does not mean you will stick to that plan. We had to be flexible, and to let go of expectations if needed.
Looking at the different approaches to machine making was eye-opening. Everyone faced different challenges depending on the word they were given, materials, and structure chosen. I believe there was only one group that successfully got us to guess their word. However, if given more time, I truly believe we all have the skills to perfect a machine that represented a specific word. Some pairs were able to get reliable and repetitive mark-making, others chose wet media, while some chose to create machines that rolled around. There was a lot of variety, and this was an especially inspiring moment for me. I was intrigued by the ability to create something reliable - meaning the machine would continuously make marks without breaking down. I was also surprised that the idea of a wet media never crossed my mind. What would it be like to create a Painting Machine, and how would I do it? More on that later...


Comments